The Exynos 5 octa-core variant of Samsung Galaxy S4 (GT-I9500) has received a new software update with firmware build number I9500XWUBMG5. The new software update is still based on Android 4.2.2 Jelly Bean version and now available in India, Nepal, Sri Lanka, and Bangladesh.
Samsung Galaxy S4 I9500 users who have already updated their devices with Android 4.2.2 XWUBMG5 Jelly Bean, may root their devices using the tutorial below.
This tutorial uses CF-Auto-Root file released by recognised XDA Developers, Chainfire. The CF-Auto-Root file allowing Galaxy S4 users to root their devices easily without depending on the firmware. It completely supports Android 4.2.2 Jelly Bean and future firmware as well. Head over to the CF-Auto-Root main thread to learn more about the root method.
Disclaimer: Rooting voids the warranty of your device. We and the developer of this rooting procedures shall not be held responsible if any undesirable outcomes may happen to your device. use of this root guide is solely at your own risk!
Pre-requisites 1. Install USB Drivers for Samsung Galaxy S4 on the computer. 2. Enable USB Debugging Mode on the phone by navigating to Settings >> Developer Options. 3. Make a backup of all your important data before following the guide. 4. The Galaxy S4 should be factory unlocked and not locked to any particular carrier. 5. Ensure the battery of the phone is charged more than 80 per cent. 6. The CF-Auto-Root file works only on Samsung Galaxy S4 I9500. Applying this to any incorrect variant might brick the device. Verify the model number of the Galaxy S4 by navigating to Settings >> About Phone.
Steps to Root Galaxy S4 I9500 Running on Android 4.2.2 XWUBMG5 Jelly Bean Firmware Step 1: Extract CF-Auto-Root and Odin 3.07 files using winrar/7zip/winzip or any other extracting tool. Step 2: Switch off the Galaxy S4. Then boot the device into Download Mode by pressing and holding Volume Down, Home and Power buttons together until a construction Android robot icon with a warning triangle appears on screen. Now press the Volume Up button to enter Download Mode. Step 3: Launch Odin on the computer as an Administrator. Step 4: Connect the Galaxy S4 to the computer using USB cable while it is in the Download Mode. Wait until Odin detects the device. When the device is connected successfully, the ID: COM box will turn blue with the COM port number. Additionally, the successful connected will be indicated by a message saying Added. Note: If the Added message does not appear, then try re-install USB drivers or changing the port on the computer. Step 5: In Odin, click the PDA button and select the CF-Auto-Root-ja3g-ja3gxx-gti9500.tar.md5 file. Step 6: Verify that Auto Reboot and F.Reset Time checkboxes are selected in Odin. Also, ensure the Re-Partition option is not selected. Step 7: Double-check and click Start in Odin. The installation process will now begin. Step 8: Once the installation process is completed, your phone will restart and soon you will see a PASS message with green background in the left-most box at the very top of the Odin. You can now unplug the USB cable to disconnect your device from computer.
Samsung Galaxy S4 I9500 running on Android 4.2.2 XWUBMG5 Jelly Bean firmware is now rooted successfully. You can now install any app that requires root permission. Verify the root status of the device by downloading Root Checker app from Google Play Store.
Thanks to all fellas at XDA who first tried out this rooting technique. This method was originally posted via XDA-Developers original thread.
It was the company’s answer to the iPad — but not exactly, since the closest thing it had to a killer feature was the a flip-out kickstand and optional keyboard covers which let you use it like a laptop.
And it was also a PC — but not quite, since the only conventional Windows software it ran was Microsoft Office and a few other preinstalled apps.
It was, in short, hard to pin down.
One year later, the sequel – Surface 2 — is here. Microsoft is calling it “the most productive tablet on the planet,” which downplays direct competition with the iPad in favor of carving off a new niche. But even though the niche makes sense for Surface to tackle, this device doesn’t go all the way toward fulfilling it.
What’s most interesting about Surface 2 is pretty much what was interesting about Surface RT, which is quite a lot: the kickstand, the keyboard covers, the full copy of Microsoft Office which comes preinstalled. It has a USB port and a MicroSD slot, providing opportunities for expansion and customization — such as the addition of a mouse and extra storage — which the iPad has famously written out of the picture.
Above all, what’s significant about the new Surface remains the fact that it runs Windows RT. The operating system has the same touch-friendly, stylish Metro interface as Windows 8, and runs new-style apps from Microsoft’s Windows Store. It has almost nothing in common with any previous version of Windows — it can’t even run the third-party applications which they can — and is also distinctly different from the iPad and Android tablets. Whether you find it bold or befuddling, it’s not more of the same.
As it did last year, Microsoft islaunching two variants on this concept. Surface 2 is available in a 32GB model for $449 and a 64GB one for $459 (neither price includes a keyboard cover). It’s arriving alongside Surface Pro 2, a largely similar — albeit thicker and heavier — device which includes Windows 8.1 and comes with a nifty pressure-sensitive pen for note-taking and doodling. Surface Pro 2 starts at $899, twice the price of the most basic Surface 2. But it also runs classic Windows apps, from your favorite games to full-strength Photoshop, making it a plausible primary PC for more folks. (My colleague Jared Newman bought one and tells me he’s pretty pleased with it overall.)
The original Surface RT remains on the market, too. It’s now simply known as Surface, and is a $349 budget special.
Most of Surface 2′s hardware changes compared to that first Surface are minor — sometimes exceedingly so. The case is still made of magnesium, and still looks classy and feels solid, but now it’s a light gray rather than the darker shade of the original model. Microsoft touts Surface 2 as being “leaner” than its predecessor, but at 0.35 of an inch thick and 1.49 pounds, it’s only slightly over 0.02 of an inch thinner and less than one-fifth of an ounce lighter. That reduction in bulk feels like a rounding error, especially in comparison to Apple‘s newly downsized iPad Air.
Other upgrades are more meaningful: The new Surface sports a faster processor than the Surface RT and a pleasing new 10.6-inch display with the same resolution as the Surface Pro 2: 1920-by-1080 pixels. The kickstand now pops out to two different angles: 22 degrees (like the original) or 55 degrees (designed, Microsoft says, to work better if you’re balancing this newfangled laptop in your lap). The front- and back-facing cameras offer higher resolution and better performance in murky lighting; the USB port supports USB 3.0, the zippy current version. Estimated battery life is now 10 hours, up from eight for the first Surface; in my informal tests, it at least came close.
The Surface 2 which Microsoft provided to me for review was equipped with the second-generation version of its $130 Type Cover. It’s one millimeter thinner than the first version, sports backlit keys and permits quieter typing. Like all Surface covers, it snaps on and off in a jiff via a magnetic connector on the tablet’s edge and doesn’t require its own battery or any setup. It’s not perfect — the touchpad is still too dinky and tough to manuever — but overall, it’s the best tablet keyboard I’ve ever used.
I didn’t try the $120 Touch Cover 2, which sacrifices discrete keys for a flatter, thinner, one-piece keyboard; it’s also added backlighting and uses 1,092 sensors rather than the original’s 80 sensors to provide better typing accuracy. Early next year, Microsoft also plans to ship a $200 Power Cover, which is exactly what it sounds like: A keyboard cover with a built-in battery which can provide extra juice to extend the Surface’s run time.
So that’s the Surface 2 hardware: refined, but not redefined.
The tablet’s operating system is Windows RT 8.1 — that is, Windows RT with Windows 8.1′s improvements — and that’s a reasonably big deal in itself, as long as you find the basic idea of the new interface intriguing rather than off-putting. (The update is also now available on the original Surface.) Not only can you run two apps on screen at once — an option which the iPad, of course, doesn’t offer — but you can adjust their size. SkyDrive, Microsoft’s online storage service, is more seamlessly built into the OS, permitting you to store more of your files in the cloud without giving it much thought. The new-style Start screen now lets you organize your apps with more flexibility, and the search feature finds stuff across your device, the Web and elsewhere.
Microsoft also throws in a few new freebies with the Surface 2 which are actually worth something. It comes with a roomy 200GB of storage of SkyDrive online storage — available on all your gizmos, not just the tablet — for two years. For the first year, you can also use Skype to make unlimited calls to landlines, and get gratis connections to two million Wi-Fi hotspots around the world.
The bundled version of Office which comes with Surface has one big change which will matter a lot to some worker bees — it now comes with Outlook, the Microsoft e-mail program which is standard equipment in many businesses. Outlook, Word, Excel and PowerPoint offer Office’s signature benefits: almost every feature you can imagine, and perfect compatibility with the files your coworkers create in other versions of Office. Nobody will ever accuse these apps of being underpowered, which isn’t true of most productivity software for other tablets. But as with last year’s Surface, Office isn’t an unalloyed plus for Surface 2. All of these programs still use the old-school Windows interface, modestly updated to work with touch input. They sit on a vestigial version of the classic Windows desktop, and never quite feel entirely at home. For instance, they don’t deal well with being shrunk down to share screen real estate with other apps — sometimes information runs off the display or gets hidden by a scroll bar. And if you’re using the tablet with the on-screen keyboard and pop open an Office app’s Ribbon toolbar, the viewable portion of your document is reduced to a tiny sliver.
Basically, using Office on the Surface 2 leaves you craving a version of Office designed with the new interface in mind. Microsoft says that one is on its way, though it isn’t yet being specific about when it might show up.
Third-party apps do at least as much as anything preinstalled to determine what you can do with a device, and it’s de rigueur in reviews like this one to point out at least one major app which isn’t available in Microsoft’s Windows Store. (Here’s one: Candy Crush Saga.) Still, after a year of operation, the store shows signs of life. Among the 100,000-plus apps it offers for Surface 2 are nice official versions of Facebook, Twitter and eBay. Foursquare may be better than it is on any other platform, and Flipboard is on it way.
Yet when it comes to productivity — the subject which Microsoft has chosen to play up as Surface’s defining virtue — the pickings remain surprisingly slim. In categories where the iPad offers multiple solid options, such as blogging apps, you’re lucky if the Windows Store has anything at all. Programs such as Adobe’s Photoshop and Autodesk’s Sketchbook are available only in basic versions, not the much meatier editions available for the iPad and Android tablets.
It’s not that it’s impossible to build a good productivity application which will take full advantage of the Surface 2. Microsoft’s OneNote — one Office app which is already preinstalled in a Metro version — is just fine. I also like Back to the Drawing Board, a computer-assisted drafting program. Jared recommends a music app called FL Studio Groove. There are other examples, too, just not enough of them. (Sadly, TouchMail, an e-mall package which I got excited about in preview form back in April, remains a preview: It doesn’t let you access your own accounts.)
I’m still rooting for Microsoft to get Surface right, and I figure that it has at least another year before the platform faces anything like an existential crisis. The good news is that Surface doesn’t really need more pixels or additional kickstand angles or a beefier battery: If Microsoft ships a well-done Metro version of Office and convinces more developers to write top-notch productivity apps, Surface 2 will feel like a whole new computer, no hardware upgrades required. But without them, it’ll continue to feel incomplete.
Keeping in touch with family and friends has become easier and faster — thanks to our Android smartphone. However, not all people who can contact us through our mobile phones are people that we love and cherish; some are spammers, annoying strangers, telemarketers, and other unwanted callers. You don’t need to suffer these unwanted calls. Block them! In this guide, learn how to block phone calls on your Android phone. You may also skip to our video guide below.
Built-in call blocking features
Most Android phones allow you to block contacts on your phone. The procedure can be unique on your Android phone. It varies from phone to phone.
Voicemail redirection on Nexus 4
Although not exactly a call blocking feature, the voicemail redirection feature on the Nexus 4 can be used as a call blocker of some sort. To redirect calls to voicemail, just select a contact from the People app, open the Menu, and select All Calls to Voicemail. Calls from the selected contact will now be directed to your voicemail box. Also, if you don’t have a voicemail subscription or you haven’t setup your voicemail properly, the phone will automatically reject calls from the redirected contacts.
Call barring on Xperia T, HTC One
On the Xperia T and HTC One, call blocking is known as Call Barring, which can be accessed on either phone’s Call Settings page on the Settings menu. Here you can block all outgoing calls, outgoing international calls, outgoing international roaming, all incoming calls, or incoming international roaming calls from everyone. You will need your barring passcode in order to activate these features. On the HTC One, there is another way to block calls — through the Phone app. Just open the menu in the Phone app and select Blocked Contacts. Then, tap the Add button to add a contact to block. You can either add a contact from the People app or manually enter a number to block.
Call rejection on Optimus G
To block calls on the LG Optimus G, go to Settings > Call > Call Reject. From there you can enable the phone’s feature to reject all calls. You can also create a rejection list that only blocks calls from contacts included on the rejection list.
Reject List on Galaxy S4
Users of the Samsung Galaxy S4 can take advantage of the phone’s Reject List, which keeps a list of numbers that are blocked. There are two ways to add a contact onto the Reject List. The easiest way is as follows:
Open the contact’s page.
Tap the Menu button.
Select Add to Reject List.
The steps above will cause all of the selected contact’s numbers to be added to the Reject List. On the Contacts list, blocked numbers are shown with the blue universal “No” symbol. If you need to block only some of the contact’s numbers, you can unblock the valid numbers through the Auto Reject List menu in the Phone app. Another way to block contacts is to manually add numbers to the Reject List, as follows:
Open the Phone app.
Tap Call Settings.
Tap Call Rejection.
Tap Auto Reject List to open the list.
Specify an exact number. You can also add numbers matching a search string that you specify. For example, you can add contact numbers that start or end with the digits that you provide, or includes the digits specified.
Blocking Mode on Galaxy S4
The Samsung Galaxy S4 also has the Blocking Mode feature, which lets you limit phone calls at certain hours. To enable Blocking Mode, go to Settings. Open the My Device page, tap the Blocking Mode option, and from there turn on the Blocking Mode switch. You can select what features to block. You can disable incoming calls, notifications, alarm and timer, and/or LED indicator. When blocking calls in this way, all incoming calls will be automatically rejected and you will not hear any ring or feel any vibration when there is an incoming call, but you will see a notification of the missed call. If you want certain contacts to be able to reach you even if Blocking Mode is enabled, specify them in the list of Allowed Contacts.
Third-party apps for blocking phone calls
If your Android phone doesn’t have an inbuilt call blocking feature or if it does but you find it lacking, you can choose one from the many third-party call blocking apps on the Google Play Store. Of particular note are the Mr. Number app, Call Blocker app, and Calls Blacklist app.
Mr. Number
The Mr. Number app is a free and ads-free Android app that allows you to block unwanted calls and texts on your mobile phone. This app protects your phone from spam, silence selected contacts, or even keep your phone inaccessible by the rest of the world. Mr. Number also has a Remote Lookup feature that allows you to find information about an unknown caller in the U.S. The first 20 lookups are free and you will be charged about US$1.00 for the next 20 lookups. This app also has a Business Caller ID that provides information about callers using a business line. Here’s a general idea of how to use Mr. Number:
Download, install, and launch the Mr. Number app. Tap OK to continue.
Verify your country. Select your country with your country code, and type your phone number. Tap OK to continue.
To begin blocking contacts, tap the “No” or prohibition symbol at the upper-right portion of the screen to access the block list.
The Blocklist contains three tabs: Hang Up, Voicemail, and Exceptions. When a contact listed on the Hang Up tab tries to call you, your phone will automatically Hang Up the call. Callers listed under Voicemail will have their calls redirected to the voicemail box. You can add numbers to the Hang Up and/or Voicemail tabs in various ways:
Suspected spam
All private/blocked numbers
Choose from recent calls or texts
Enter a number
Choose from contacts
All numbers not in contacts
All numbers beginning with…
All numbers in contacts
All numbers
The Exceptions tab lists contacts that will not be blocked or redirected. So, if you want to keep in touch with your family and friends while keeping the strangers and spammers at bay, register your family and friends’ contact numbers under the Exceptions tab. You can also block contacts right from the app’s main screen. Under the Recent tab, which shows the history of received calls and text, tap the Menu button beside each log entry and select Block Number. A popup will appear, asking you whether to block the contact or redirect all the contact’s calls to your voicemail. You can also mark it as a spam number and add a comment about the blocked contact number. A notification will appear every time the app intercepts a blocked contact. The history of blocked contacts will be displayed under the Blocked History tab on the app’s main screen.
Call Blocker
Another handy call blocker app that you’d want to try is the free and ad-supported Call Blocker app. If you subscribe to the paid and ad-free version, you can enjoy premium features, including the Private Space feature that securely stores private SMS messages and call logs. Here’s a general idea of how to use Call Blocker:
Download, install, and launch the Call Blocker app. Tap Agree to continue.
On the app’s main menu, tap the Blocked Calls button.
Tap the add button (represented by an icon of paper with check and X marks)
The Blacklist and Whitelist tabs will be displayed on the screen. Tap Add Number to add a contact. You can add a number via your contacts, call log, or SMS log, or you can type the number directly. Contacts listed on the Blacklist tab will be blocked (of course!) while contacts on the Whitelist tab will be exempted.
Calls Blacklist
Last but not the least on our list is the free and ad-supported Calls Blacklist, a very simple app for keeping a list of contacts that you don’t want to allow to contact your phone. An ad-free premium version is also available for about US$3.00. To block calls with Calls Blacklist, just launch the app and add a contact number to the Blacklist tab. You can add a number via your Contacts, call logs, or messages log, or add numbers manually. And, that’s it! Contacts saved under Blacklist won’t be able to call your Android phone anymore.
The International version of Samsung Galaxy S3 with model number GT-I9300 has received Android 4.3 Jelly Bean update firmware. The new official firmware is currently available as an Over-The-Air (OTA) update as well as through Samsung KIES.
Samsung Galaxy S3 I9300 users who have already updated their devices with Android 4.3 Jelly Bean, may root their devices using the tutorial below.
This tutorial uses CF-Auto-Root file released by Elite Recognized XDA Developers, Chainfire. The CF-Auto-Root file allowing Galaxy S3 users to root their devices easily without depending on the firmware. It completely supports Android 4.3 Jelly Bean and future firmware as well. Head over to the CF-Auto-Root main thread to learn more about the root method.
Disclaimer: Rooting voids the warranty of your device. We and the developer of this rooting procedures shall not be held responsible if any undesirable outcomes may happen to your device. use of this root guide is solely at your own risk!
Pre-requisites 1. Install USB Drivers for Samsung Galaxy S3 on the computer. 2. Enable USB Debugging Mode on the phone by navigating to Settings >> Developer Options. 3. Make a backup of all your important data before following the guide. 4. The Galaxy S3 should be factory unlocked and not locked to any particular carrier. 5. Ensure the battery of the phone is charged more than 80 percent. 6. The CF-Auto-Root file works only on the international version of Samsung Galaxy S3 (GT-I9300). Applying this to any incorrect variant might brick the device. Verify the model number of the Galaxy S3 by navigating to Settings >> About Phone.
Steps to Root Galaxy S3 I9300 Running on Android 4.3 Jelly Bean Firmware Step 1: Extract CF-Auto-Root and Odin 3.07 files using winrar/7zip/winzip or any other extracting tool. Step 2: Switch off the Galaxy S3. Then boot the device into Download Mode by pressing and holding Volume Down, Home and Power buttons together until a construction Android robot icon with a warning triangle appears on screen. Now press the Volume Up button to enter Download Mode. Step 3: Launch Odin on the computer as an Administrator. Step 4: Connect the Galaxy S3 to the computer using USB cable while it is in the Download Mode. Wait until Odin detects the device. When the device is connected successfully, the ID: COM box will turn to light blue with the COM port number. Additionally, the successful connected will be indicated by a message saying Added.
Note: If the Added message does not appear, then try re-install USB drivers or changing the port on the computer. Step 5: In Odin, click the PDA button and select the CF-Auto-Root-m0-m0xx-gti9300.tar.md5 file. Step 6: Verify that Auto Reboot and F. Reset Time checkboxes are selected in Odin. Also, ensure the Re-Partition option is NOT selected. Step 7: Double-check and click Start in Odin. The installation process will now begin. Step 8: Once the installation process is completed, your phone will restart and soon you will see a PASS message with green background in the left-most box at the very top of the Odin. You can now unplug the USB cable to disconnect your device from computer.
Samsung Galaxy S3 I9300 running on Android 4.3 Jelly Bean firmware is now rooted successfully. You can now install any app that requires root permission. Verify the root status of the device by downloading Root Checker app from Google Play Store.
Thanks to all fellas at XDA who first tried out this rooting technique. This method was originally posted via XDA-Developers original thread.
Galaxy S4 apps, how do I uninstall thee? Let me count the ways. Android is an app-driven platform. Everything that you can do on your Galaxy S4 you can achieve by running apps. Some apps (especially system apps) come with your phone straight from the factory, others you install from sources such as the Google Play Store. There’s not much that you can do to remove preinstalled system apps, but — just in case you haven’t gotten round to actually doing it first time — you can actually uninstall user apps and recover storage space. If you think that the only way to uninstall apps on the Galaxy S4 is through the Google Play Store app, then this article holds a few surprises for you. In this article, you’ll learn how to uninstall apps on the Galaxy S4. There are actually several ways to do it.
Using Google Play Store app
This, of course, is a no-brainer. But, for completeness, let me just include this here. While you can argue that the Uninstall button is hard to miss on a freshly installed app’s page in the Google Play Store app, some people do have the innate ability to overlook that button. Although not the one and only source, the Google Play Store is the default primary source of apps for most Android users. Its accompanying app allows you to discover and install new apps or remove and uninstall old ones. App uninstallation via the Play Store app takes only a few steps:
open Play Store app,
tap on Menu,
select My Apps,
tap on name of app to be removed, and
tap the Uninstall button.
Yup — that easy. Doesn’t take a genius, really. Take note, however, that if you manually install apps through some other way besides the Play Store, those apps sometimes do not appear on the list in the Play Store app. Such apps can be uninstalled through other means.
Using Application Manager
Besides the Play Store app, Android’s built-in Application Manager can also be used to uninstall apps. Just open the Settings app, tap on the More tab, and select Application Manager. In Application Manager, you should be able to see a list of your installed apps, organized into four tabs:
Downloaded — Lists all apps that you downloaded to your phone
On SD Card — Lists all apps that are installed in your phone’s storage
Running — Lists all apps that are active or are running in the background
All — Lists all apps, regardless of source or installation location
To remove an app using the Application Manager, just tap the app’s name on the list to open the app’s info page, then tap the Uninstall button. It’s that easy. You may want to tap the Clear Data and Clear Cache buttons first before hitting Uninstall.
Using TouchWiz UI
App Drawer Edit Mode
If, for some reason, you find the Play Store or Application Manager method a bit long-winded for your app uninstallation pursuits, seek refuge in TouchWiz. The Samsung TouchWiz interface for the Galaxy S4 comes with a UI-based method for easily uninstalling an app. You can do it in just four steps:
Open the App Drawer.
Tap Menu.
Tap Edit.
Hold down and drag the app’s icon to the Uninstall icon at the top-right.
The foregoing method also lets you remove apps that you manually installed.
Alternate UI method
An alternate method for easily uninstalling apps from the App Drawer is as follows:
Open the App Drawer.
Tap Menu.
Tap Uninstall.
You’ll see red bars overlayed on the icons of apps that you can uninstall. Just tap on the red bar to uninstall the app.
The foregoing method also lets you remove apps that you manually installed.
Using an app manager app
Yet another way to remove an app from your Galaxy S4 is through the use of app managers, task managers, or file manager / explorer apps. There are several of such apps on the Google Play Store. ES File Explorer, for example, has an App Manager component that lets you uninstall, backup, share, or send apps. Most remote device management apps such as AirDroid also have app uninstallation features.
Using ADB
If you’re into command-line interaction with your Galaxy S4, then you’ll probably want to learn some uninstallation tricks using the Android Debug Bridge (ADB). For this method to work, you’ll need a working ADB setup on your computer. Also, ADB must be able to recognize your Galaxy S4 when you run the command adb devices at a terminal. To uninstall an app via ADB, you must know the app’s package name (which is not necessarily the app’s APK file name). If you don’t know the app’s package name, you can quickly summon a list of the names of installed packages on your phone with the following command: adb shell pm list packages Here’s an example output of the command above: Each package name listed is prefixed with package:, but you should be able to easily spot your app’s package name from the list. According to the list, the package name for the Mozilla Firefox app, for example, is org.mozilla.firefox. Once you’ve identified the app’s package name, simply issue the following command: adb uninstall packagename where packagename is the app’s package name. So, to uninstall Mozilla Firefox, for example, you’d use the following command: adb uninstall org.mozilla.firefox
The Exynos 5 octa-core variant of Samsung Galaxy S4 (GT-I9500) has received a new Android 4.3 Jelly Bean firmware. The new official firmware is currently available as an Over-The-Air (OTA) update as well as through Samsung KIES.
Samsung Galaxy S4 I9500 users who have already updated their devices with Android 4.3 Jelly Bean, may root their devices using the tutorial below.
This tutorial uses CF-Auto-Root file released by Elite Recognized XDA Developers, Chainfire. The CF-Auto-Root file allowing Galaxy S4 users to root their devices easily without depending on the firmware. It completely supports Android 4.3 Jelly Bean and future firmware as well. Head over to the CF-Auto-Root main thread to learn more about the root method.
Disclaimer: Rooting voids the warranty of your device. We and the developer of this rooting procedures shall not be held responsible if any undesirable outcomes may happen to your device. use of this root guide is solely at your own risk!
Pre-requisites 1. Install USB Drivers for Samsung Galaxy S4 on the computer. 2. Enable USB Debugging Mode on the phone by navigating to Settings >> Developer Options. 3. Make a backup of all your important data before following the guide. 4. The Galaxy S4 should be factory unlocked and not locked to any particular carrier. 5. Ensure the battery of the phone is charged more than 80 percent. 6. The CF-Auto-Root file works only on Samsung Galaxy S4 I9500. Applying this to any incorrect variant might brick the device. Verify the model number of the Galaxy S4 by navigating to Settings >> About Phone.
Steps to Root Galaxy S4 I9500 Running on Android 4.3 Jelly Bean Firmware Step 1: Extract CF-Auto-Root and Odin 3.07 files using winrar/7zip/winzip or any other extracting tool. Step 2: Switch off the Galaxy S4. Then boot the device into Download Mode by pressing and holding Volume Down, Home and Power buttons together until a construction Android robot icon with a warning triangle appears on screen. Now press the Volume Up button to enter Download Mode. Step 3: Launch Odin on the computer as an Administrator. Step 4: Connect the Galaxy S4 to the computer using USB cable while it is in the Download Mode. Wait until Odin detects the device. When the device is connected successfully, the ID: COM box will turn to light blue with the COM port number. Additionally, the successful connected will be indicated by a message saying Added.
Note: If the Added message does not appear, then try re-install USB drivers or changing the port on the computer. Step 5: In Odin, click the PDA button and select the CF-Auto-Root-ja3g-ja3gxx-gti9500.tar.md5 file. Step 6: Verify that Auto Reboot and F. Reset Time checkboxes are selected in Odin. Also, ensure the Re-Partition option is NOT selected. Step 7: Double-check and click Start in Odin. The installation process will now begin. Step 8: Once the installation process is completed, your phone will restart and soon you will see a PASS message with green background in the left-most box at the very top of the Odin. You can now unplug the USB cable to disconnect your device from computer.
Samsung Galaxy S4 I9500 running on Android 4.3 Jelly Bean firmware is now rooted successfully. You can now install any app that requires root permission. Verify the root status of the device by downloading Root Checker app from Google Play Store.
Thanks to all fellas at XDA who first tried out this rooting technique. This method was originally posted via XDA-Developers original thread.
Good news to all Samsung Galaxy S3 Users out there! Samsung is now developing a new software built with lot of coolest features that you havent experience before on your devices. This features are going to be added on the next official Android 4.1.2 Jelly Bean that has been reported to push in December. The Android 4.1.2 is somehow leaked a couple of days ago, and some advance users already get the chance of sneaking inside the Jelly Bean 4.1.2. Some features were mostly noticeable are much more likely from the features of the latest slate Samsung Galaxy Note 2. The below are the exciting features that you might want to be added into your Galaxy S3 devices.
1. Multi-View
Multi-View which allows users to run the window screen between two different apps to run like creating a text message while also browsing the web. This essentially a multi-tasking capabilities similar to the Galaxy Note 2.
2. Page Buddy
The Galaxy Note 2 has added home screens that appear when theyre needed and are denoted with corresponding icons in the page indicator row. For instance, when the S Pen is removed, a Pen Buddy page appears with a large widget for Samsungs note-taking application. Similarly, when earphones are connected, a page appears complete with music and video widgets.
3. Smart rotation
To prevent instances where the screen unintentionally rotates, forcing you to turn it back, theres Smart rotation. This monitors your face and suppresses normal rotation if your face is tilted too.
4. Continuous input
A swipeable keyboard comes pre-installed on the Galaxy Note 2, and is enabled via the Continuous input option. You spell out each word by drawing a line from letter to letter. This works in any keyboard style or orientation.
5. Notification Panel
This mode lets you block calls, notifications, alarms and timers and the LED notification light, either all day or between certain hours. The block mode has an Allowed contacts feature so you can let chosen people bypass your blocking rules. Alternatively, this could be used to block nuisance callers.
6. Paper Artist
Galaxy note II S-Pen Coloring Application A fun Photo color app For use with Galaxy Note with S-Pen or should work on other devices as well can also use your camera with it as well
7. New Gallery App
This not likely a Gallery that look like simple but it is very awesome Gallery apps that you might wanna say sorta cool.
Again those features are juts found from leaks version and nothing yet confirmed as good to be true, but let us hope so, for those features are already installed on Galaxy Note 2 and a chance on getting it on Galaxy S3 devices. We only wait for the official update from the company, which is likely to roll out next month.
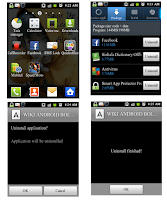
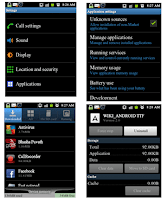
Installing any application on android phones is easy. Some application you are using long time or you are not interested, or dont like it. You want remove or uninstall application. Dont worry, I tell how to uninstall it. You can uninstall or remove apps from your phone easy without rooting. You decide uninstalling apps. Follow the steps below.
First way
: Go to menu > Select Task manager > Select package
If you got a Galaxy Note 3 for Christmas, Samsung has just given you a belated gift: Android 4.4.2can now be installed on your Note 3. Its a test build only, with a build number of N9005XXUENA6, for the Note 3 SM-N9005. If you dont mind the occasional bug while the polished version gets prepared for delivery, then you can pop the latest Android version on your Note 3 right now.Update: the official firmware update via Kies has now begun in Poland, and the firmware number for that official update is the same as this firmware, meaning nothing at all has changed since this version.
As far as changes go, according to Sam Mobile, its all much the same as the Android 4.4.2 test firmware for the Galaxy S4 that we shared last week. This is a preliminary final build, so nothing will be added or subtracted from this to the final version, just minor bug fixes and other improvements. That rollout will go live in the next couple of weeks and slowly filter out to different countries and carriers. But if you cant wait that long heres how to get Android 4.4.2 on your Galaxy Note 3.
Please note: Flashing this firmware on your device is done at your own risk and neither AndroidPIT nor I will assume any responsibility for damage done. Flashing this firmware will not void your warranty or increase your binary flash counter. Please back up your data before proceeding as this process will wipe your device. This is the Open Europe firmware for the Samsung Galaxy Note 3 (SM-N9005) with a build date of January 9th, 2014.
Install Android 4.4.2 firmware on Samsung Galaxy Note 3 N9005
1. Download the firmware here: Android 4.4.2 firmware test Samsung SM-N9005.
2. Unzip the zip file, and you will get two files with the extension .tar.md5 and a file with the extension .tar
3. Download Odin 3.09, and unpack the .zip also.
4. Launch Odin.
5. Reboot your Galaxy Note 3 in download mode (Volume Down + Power + Home button).
6. Connect your Galaxy Note 3 via USB cable to your computer and wait for Odin to recognize it. A blue box should then appear (in the program).
7. Add:
AP_N9005XXUENA6_340325_REV03_user_low_ship_MULTI_CERT.tar.md5 to AP box. BL_N9005XXUENA6_340325_REV03_user_low_ship_MULTI_CERT.tar.md5 to BL box. CP_N9005XXUENA2_REV03_CL1277177.tar.md5 to CP box. CSC_OXX_N9005OXXENA5_327209_REV03_user_low_ship_MULTI_CERT.tar.md5 to CSC box.
8. Make sure that the re-partition box is not checked.
9. Click Start and wait a few minutes until the procedure ends. Do not disconnect your Note 3, be patient.
10. Once your Galaxy Note 3 restarts, its over!
As usual, if you have any concerns at startup, perform a wipe data/factory reset in recovery mode (Volume Up + Power + Home button).
Have you flashed the Android 4.4.2 test firmware yet? What are your thoughts on KitKat on the Note 3?
[Update: 2:30 PM Berlin time 13.01.14]
The official Samsung update via Kies has already started to roll out in Poland. That official update has the exact same build number as this test firmware, meaning that no further improvemetns or bug fixes were made to the firmware presented in this article before being released officially. So if youve installed this, you have the official version, and if you were holding off - theres no longer any need (but you can also attempt to update via Kies as well).
MCQs in diode applications and OP-AMPs in the topic of Analog circuit have already been given. The Subtopic of BJT Circuits for MCQs is subdivided into the following for the convenience of viewer:
(i) BJT Characteristics and biasing
(ii) BJT models and analysis
(iii) BJT Amplifiers
A set of moderate complexity MCQs covering above subtopics are also planned to be published for practice. Presently we are publishing MCQs on BJT characteristic & biasing . These have been divided into three parts
A set of moderate complexity MCQs covering above subtopics are also planned to be published for practice. Presently we are publishing MCQs on BJT characteristic & biasing . These have been divided into three parts.
(a) BJT operating modes and configurations – Download here